Manage Permissions
Permissions can be defined and managed at different levels such as process groups, individual processes, or users.
Setting up Admin in Config (YAML)
To initiate the creation of a process model, it is necessary to configure the terraform_deployed_environment.yml file by including at least one Admin user.
groups:
  admin:
    users: [admin@spiffworkflow.org]

permissions:
  admin-type-user:
    groups: [admin]
    actions: [create, read, update, delete]
    uri: /*
Groups
The “groups” section defines a group called “admin.” This group is intended for users who have administrative privileges within the system. In this example, the “admin” group consists of a single user with the associated email address. Multiple groups can be added.
Permissions
Each permission has a name. This is just for documentation purposes and isn’t used by the system. In this example, we are describing permissions for an “admin-type-user.”
There are three keys allowed under each permission:
Key |
Description |
|---|---|
groups |
Lists the groups to which the permission applies ( |
actions |
Lists specific allowed actions. Actions can be negated using |
uri |
Defines the target resource. |
Permissions allowed:
create
read
update
delete
start
all
To allow reading and updating, it would look like this:
["read", "update"]
To allow reading and DISALLOW updating, it would look like this:
["read", "DENY:update"]
Default Permissions and User Groups**
The “everybody” Group
By default, every user who logs into the system is automatically part of the “everybody” group.
Any permissions assigned to this group apply to all users unless explicitly overridden by other settings.
The default group can be changed using the environment variable:
SPIFFWORKFLOW_BACKEND_DEFAULT_USER_GROUP
Example Usage:
If you want all new users to be assigned to a custom group instead of “everybody,” set:export SPIFFWORKFLOW_BACKEND_DEFAULT_USER_GROUP="custom-default-group"
Permission Levels
SpiffWorkflow has three primary permission levels that determine what users can do.
BASIC Permissions
BASIC permissions allow users to interact with their own information and tasks.
Users with this permission can:
✅ View details about their account and actions.
✅ Access all process instances they have created.
✅ Navigate the basic features of the platform.
✅ View tasks assigned to them.
❌ Cannot modify or interact with other users’ instances.
Use Case: Assigned to regular users who only interact with their own processes.
ELEVATED Permissions
ELEVATED permissions allow users to configure authentication and secrets for external integrations.
Users with this permission can:
✅ Define and manage secrets (API keys, credentials).
✅ Set up authentication for external services.
✅ Enable SpiffWorkflow service tasks to securely connect to external systems.
Use Case: Typically assigned to technical administrators or developers managing system integrations.
SUPPORT Permissions
SUPPORT permissions provide advanced control over process instances.
Users with this permission can:
✅ Pause a running process.
✅ Move a process back to an earlier point.
✅ Migrate a process to a new model version.
✅ Modify process data manually.
✅ View detailed execution logs for debugging.
This permission is typically restricted to administrators or support engineers, as it allows modification of live workflows.
Use Case: Assigned to support teams responsible for troubleshooting process instances.
Permission Level |
Capabilities |
|---|---|
BASIC |
Users can view and interact with their own processes and assigned tasks. |
ELEVATED |
Users can define secrets, configure authentication, and manage external integrations. |
SUPPORT |
Users can pause, modify, migrate, and debug any process instance. |
Site Administration
Setting up permissions in a YAML file may fit your needs. If not, there are other methods to configure which users are assigned to which groups and what the users in the groups can do. One way is to create a process model that defines groups and permissions. Setting up such a process model is described below.
Step 1: Create Process Group
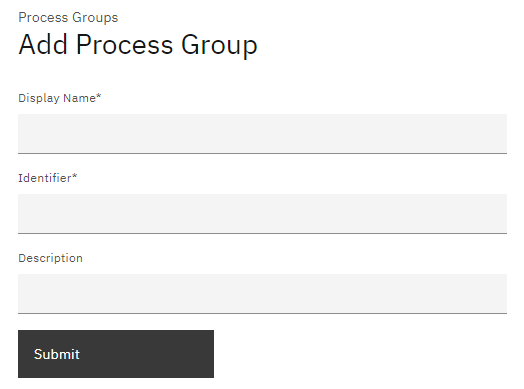
From the main menu select ‘Processes’ and click on the ‘Add a process group’ button.

Complete the Process Groups form by entering the
Name (ensuring it reflects admin and permissions)
Identifier (which must be unique)
Description.
Once the required fields are filled, the form can be submitted.
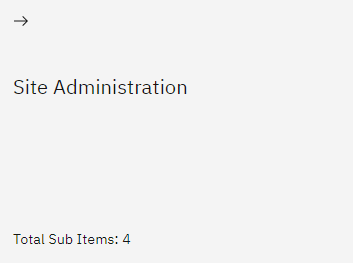
The new Process Groups tile will be available under the Process Groups view.
Step 2: Add Process Model
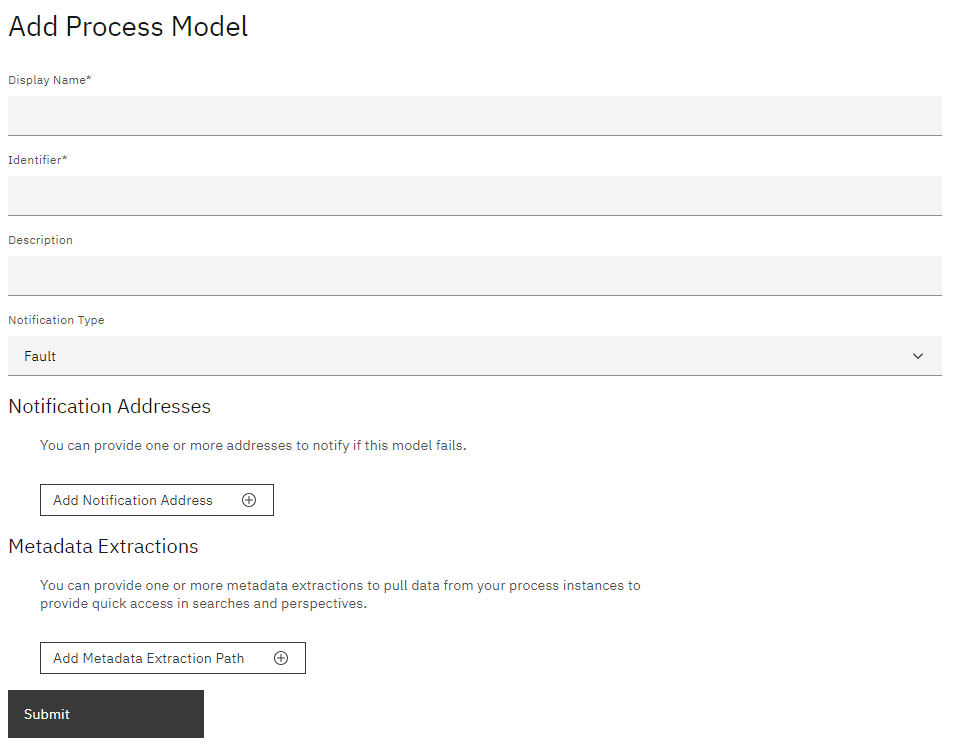
Select ‘Add a process model’ and complete the following form fields:
Name: Provide a descriptive name for the process model.
Identifier: Enter a unique identifier for the process model.
Description: Provide a brief description of the process model, outlining its purpose or functionality.
Notification Type: Specify the type of notification related to the process model.
Notification Addresses: Enter the addresses or destinations where notifications should be sent in the event that a process instance encounters an error. You do not need to worry about setting these values unless you are interested in custom Process Error Handling.
Metadata Extraction Path: You can provide one or more metadata extractions to uplift data from your process instances to provide quick access in searches and perspectives. Specify the key and path/location where metadata extraction should occur within the process model. For example, if you have a script task that runs the statement
great_color = "blue", then you would set the extraction path togreat_color. You would probably also set the extraction key togreat_color. But if you wanted to, you could just call itcolor, assuming you wanted that to be the name used in reports, etc.
Make sure to accurately fill in all the required fields in the Process Model form to ensure proper configuration and functionality.
Step 3: Upload Workflows
All the required workflows can be downloaded from Github - set-permissions
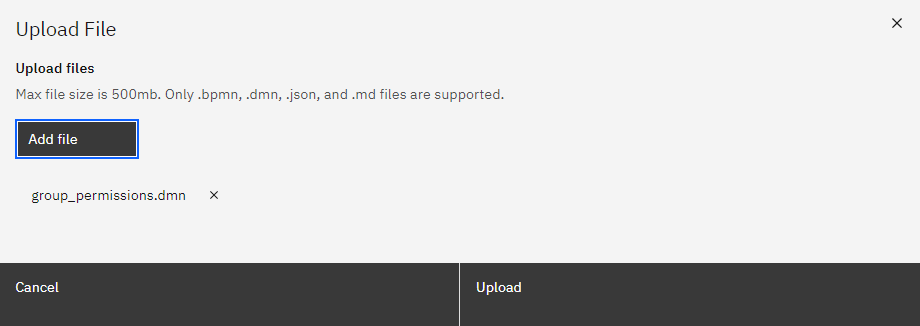
Select to upload all downloaded files to the newly created Process model.

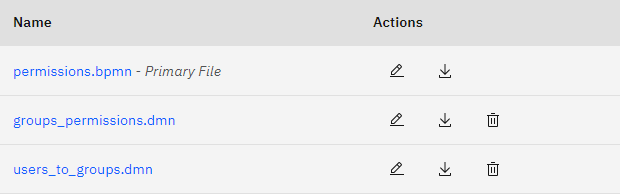
Upload the following files:
permissions.bpmn - Primary file
groups_permissions.dmn
users_to_groups.dmn
The Process Model view should now include all uploaded files.
Step 4: Understand the Process Models
Read more about DMN tables and how they work here.
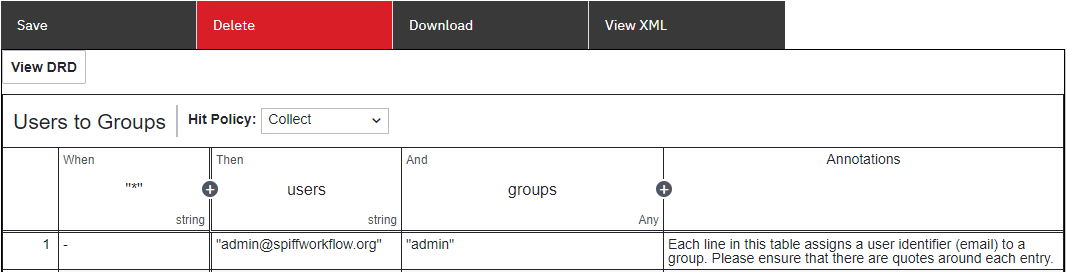
Users to Groups
Assess the roles and responsibilities of users within your organization or system. Look for common patterns or similarities in their job functions and tasks related to specific processes or process groups.
Add a user email under the users ‘column’ and the group name under ‘groups’ and don’t forget to add double quotes.
Note
Based on DMN functionality, leaving the “*” column empty means that all rules (‘When’) will be triggered without specifying a condition. Read more about DMN tables to understand how the rules engine can be utilized for many different scenarios.
Group Permission
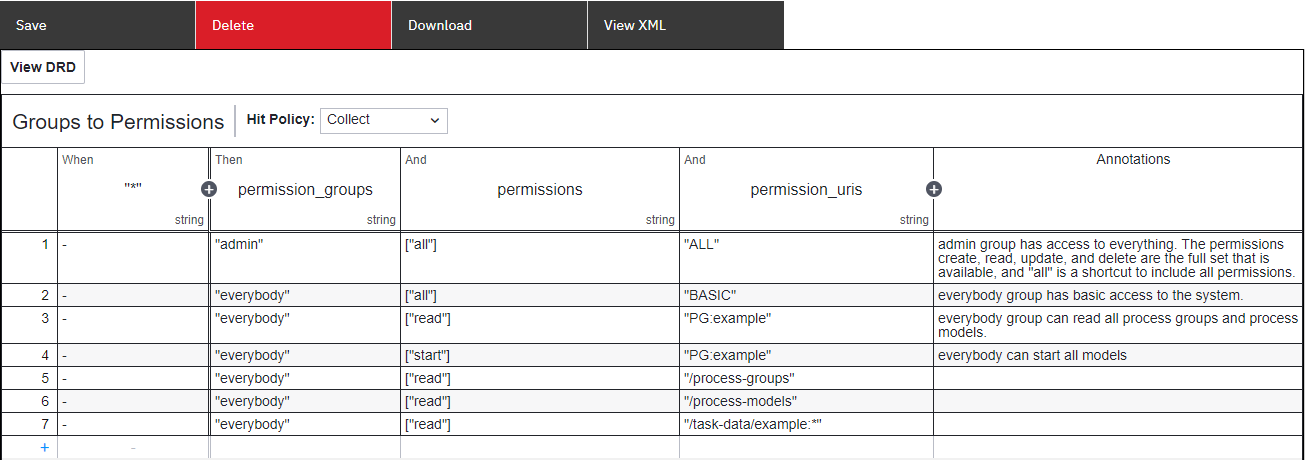
Now that the groups have been identified, their permissions can be set by adding the group name under the “permissions_group” column.
To determine a user’s capabilities within the permissible scope, you can define specific permissions. These permissions can be combined in a sequence if multiple apply to a particular rule. For instance, [“read”, “start”] indicates that the user can perform both reading and starting actions. Alternatively, [All] can be employed to grant unrestricted access.
The hit policy is set to “Collect” which means that all conditions that are true will be applied. Read more about DMN tables and hit policies here.
The permission URL can be configured to define the user’s access privileges. Our objective is to streamline the process by minimizing the necessity of being familiar with the complete set of permission URLs. In most instances, utilizing BASIC and ELEVATED permissions, as well as PM/PG, should be sufficient. However, it is also feasible to directly incorporate any API URL into the permissions.
In truth, what you are doing is writing an expression. In this case, it would read that if the variable ‘permissions_group’ type string is equal to ‘permissions’ variable of type string then set the ‘permission_url’ equal to the associated value.
Note
If you find coding more familiar and preferable to constructing DMN tables, you may notice similarities between this DMN table and the shared permission configuration file. This similarity can help clarify or make it easier for you to understand the DMN table structure and its relation to the permission configuration.
Step 5: Start Process
To ensure that User Groups and Permissions take effect, it is necessary to run the process at least once. Whenever changes are made to any of these diagrams, like adding a user group or permission, the process should be started and completed successfully in order for the changes to be applied.