Keycloak Setup Guide for Clients
Keycloak is an open-source identity and access management solution that provides authentication, authorization, and user management features.
This guide outlines the steps to configure Keycloak for a client, including granting admin privileges within a realm and allowing users to log in using Google authentication.
NOTE If running spiffworkflow and keycloak through docker compose, you may need to set “SPIFFWORKFLOW_BACKEND_OPEN_ID_ADDITIONAL_VALID_ISSUERS” in the backend to contain the appropriate localhost domain for keycloak. Otherwise, backend will talk to keycloak with a docker compose network host and the web client will use localhost and that will invalidate the token.
1. Super Admin Tasks: Allowing Realm User Management
To allow user management in a specific Keycloak realm, follow these steps:
Step 1: Select the Realm in the Keycloak Admin Console
Log in to the Keycloak Admin Console. Select the realm you wish to allow access to.
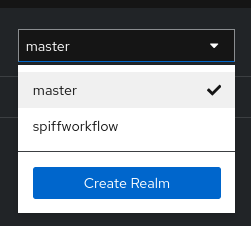
Step 2: Enable security-admin-console for the Realm
Navigate to Clients. Search for security-admin-console. Ensure that it is enabled for the realm.
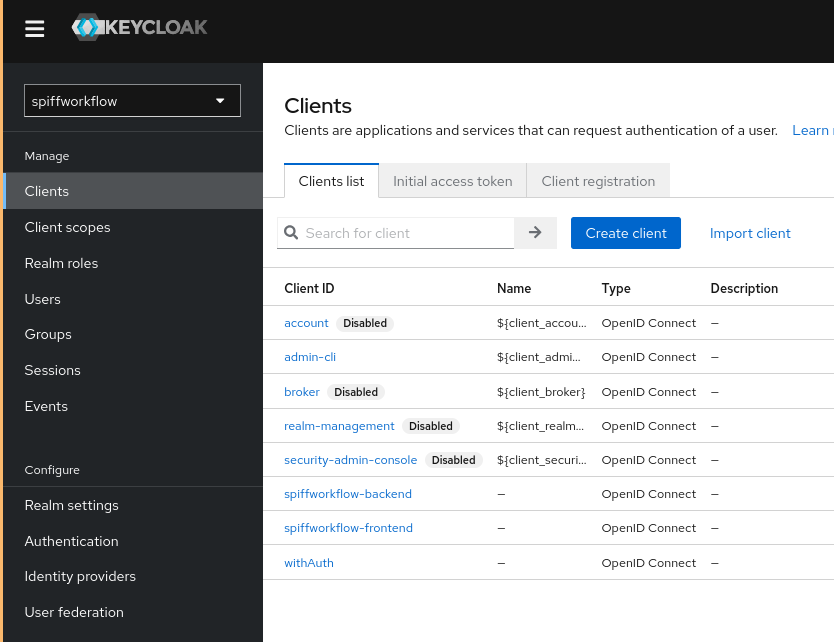
Step 3: Assign Admin Roles to a User
To grant a user admin access for adding/managing users:
Navigate to Users in the left sidebar. Find or create the user who needs admin privileges.
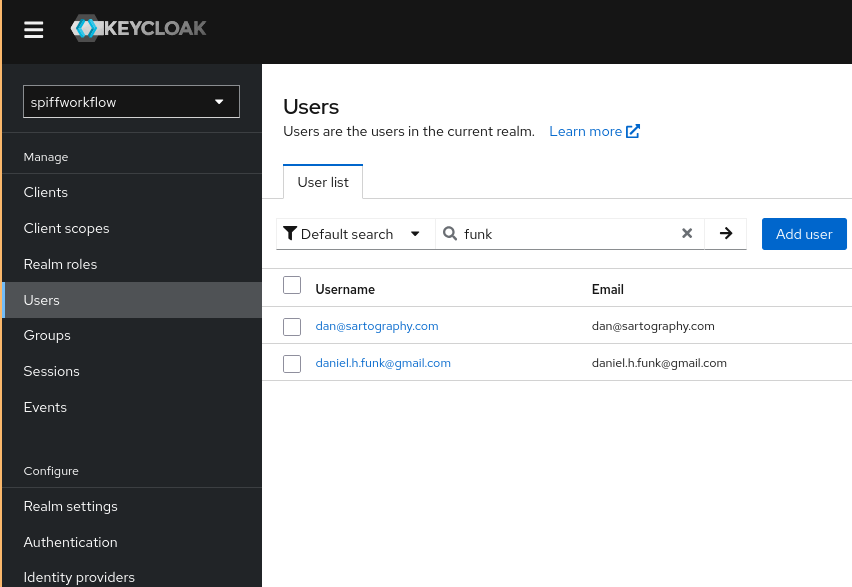
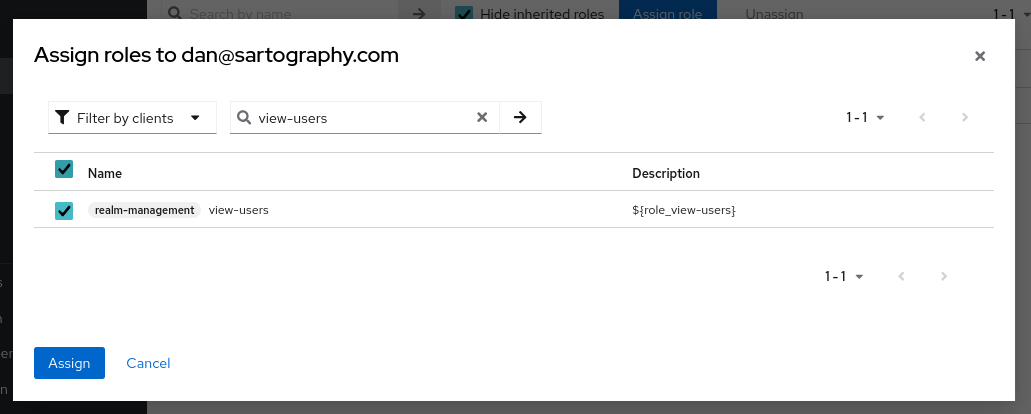
Open the user’s profile and go to the Role Mapping tab. Add the following roles:
view-usersmanage-users
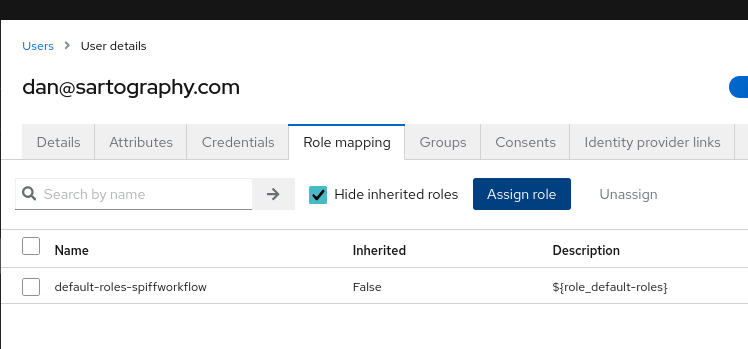
If you want to grant full admin access, search for realm-management and grant all permissions within realm management.
Step 4: Provide the Admin URL
After assigning roles, provide the user with the following URL to access the Admin Console:
https://keycloak-[CLIENT'S DOMAIN].spiff.works/admin/[REALM_NAME]/console
Example:
For a client named Civitos, the URL would be:
https://keycloak-civitos.spiff.works/admin/spiffworkflow/console/#/spiffworkflow/users
For localhost, it would be:
http://localhost:7002/admin/[REALM_NAME]/console
2. Allowing Everyone from Your Domain to Log into an Instance
(This example covers Google as an Identity Provider, but similar steps can be followed for other providers.)
Step 1: Set Up Google as an Identity Provider
Go to the Google Developer Console.
Select the project associated with Keycloak (e.g.,
spiffdemo-keycloak).In the search bar, type “Clients”.
Click on + Create Client.
Step 2: Configure the OAuth Client
Choose “Web Application” as the client type.
Enter a meaningful name based on the client, e.g., “Jons-chess-boards”.
Leave “Authorized JavaScript Origins” blank.
In the Authorized Redirect URIs section, add the following:
https://[KEYCLOAK-FOR-CLIENT]/realms/[REALM]/broker/google/endpoint
Typically, this would look something like:
https://keycloak-jons-chess-boards.spiff.works/realms/spiffworkflow/broker/google/endpoint
Save the configuration and copy the Client ID and Client Secret.
Step 3: Add Google as an Identity Provider in Keycloak
Go to the Keycloak Admin Console.
Select the appropriate Realm.
Navigate to Identity Providers → Add Provider → Google.
Enter the Client ID and Client Secret from Google.
Set First Login Flow to
first broker login(or another authentication flow if required).Click Save.
Step 4: Test Login
Navigate to the client’s login page and verify that Google Login is now an option.
Ensure that users from the domain can successfully authenticate using Google.
By following these steps, you can successfully:
✔ Grant admin access to a user for managing the realm.
✔ Enable Google-based authentication for all users in a client’s domain.
This setup ensures a secure and efficient user authentication process within Keycloak, providing administrators with the ability to manage users effectively while allowing users to authenticate seamlessly using Google.
3. API Authentication & Integration with Keycloak
Now we provide guide for developers on how to authenticate with SpiffWorkflow using Keycloak, interact with backend API endpoints, and integrate these flows into a custom frontend or testing tool like Postman or curl.
Prerequisites
Before proceeding, ensure the following:
The SpiffWorkflow backend is running and configured to use Keycloak for authentication.
A Keycloak realm (
spiffworkflow) is already set up, with appropriate client and user configurations.A valid Keycloak user has been created with access roles (e.g.,
user-group,admin-group).If using the local setup:
Keycloak runs on
localhost:7002Backend runs on
localhost:7000
Starting Keycloak & Backend (Local Setup)
cd spiffworkflow-backend

# Start Keycloak server
./keycloak/bin/start_keycloak

# Run backend server configured to use Keycloak
./bin/run_server_locally keycloak
Keep both services running in separate terminals. Ensure the backend is correctly talking to Keycloak.
Acquiring a Bearer Token (Password Grant)
To authenticate a user and get a valid access token, send a POST request to Keycloak’s token endpoint:
curl -X POST https://keycloak-[client].spiff.works/realms/spiffworkflow/protocol/openid-connect/token \
  -H "Content-Type: application/x-www-form-urlencoded" \
  -d "grant_type=password" \
  -d "client_id=spiffworkflow-frontend" \
  -d "username=<user_email>" \
  -d "password=<user_password>"
Alternatively, for local development:
KEYCLOAK_BASE_URL=http://localhost:7002 ./bin/get_token > /tmp/token
Making API Requests to SpiffWorkflow
Once you have an access token, use it to call protected endpoints:
curl http://localhost:7000/v1.0/process-groups \
  -H "Authorization: Bearer $(cat /tmp/token)"
Common SpiffWorkflow API Endpoints
Purpose |
Method & Endpoint |
|---|---|
Get all tasks for the authenticated user |
|
List all accessible process groups |
|
Get all models in a group |
|
Complete a task |
|
API documentation browser (Swagger UI) |
|
All endpoints must include a valid
Authorization: Bearer <token>header.
Logging Out from Keycloak
To revoke a session and log out a user via the Keycloak API:
curl -X POST https://keycloak-[client].spiff.works/realms/spiffworkflow/protocol/openid-connect/logout \
  -d "client_id=spiffworkflow-frontend" \
  -d "client_secret=<client_secret>" \
  -d "refresh_token=<refresh_token>"
This invalidates the token and ends the session in Keycloak.
Troubleshooting
Issue |
Resolution |
|---|---|
|
Ensure the user is created in the |
Token works but API returns empty data |
Confirm user has been assigned to the correct group (e.g., |
Postman shows missing |
|
Token not accepted by backend |
Ensure the token is sent as a |
Logout doesn’t work |
Make sure you’re using |
This flow enables secure API-based integration while retaining centralized identity control via Keycloak.